Installing custom weapons using ox_inventory

Installing and streaming a new weapon on your FiveM server is actually pretty simple. However, most people struggle to make this work with ox_inventory. This guide will also cover how to stream custom weapons on your server.
Streaming custom weapons
Generally, the act of adding custom assets to your server is called "streaming" because all the textures and 3D models are placed in a stream folder. This is why you will often see people asking, "How do I stream x?"
Finding an example resource
Now let's find a suitable resource. You can either search the official Cfx.re forums or browse modding websites like GTA5-Mods. For this guide, we will be using the LWRC M6IC made by FluffyPlays22. Why? Because the creator used a program known as vWeaponsToolkit, which ensures that the creator's assets are correctly registered and streamed to FiveM. We can verify this with the following:
- A separate folder containing all the contents along with an
fxmanifest.luafile. This ensures FiveM recognizes the folder as a resource. - All asset-related files in the
streamfolder:*.ytdfor textures*.ydrfor 3D models
- All
*.metafiles, which are necessary to inform the GTA engine how to handle the weapon:weapons.metafor information related to the weapon itself (weapon name, ammo type, audio item, etc.)weaponanimations.metaso the game knows which animation to play for certain actionsweaponarchetypes.metato link the correct texture (.ytd) files to the weaponweaponcomponents.metato register additional components like scopes, silencers, etc.—that is, attachments that determine which 3D model (.ydr) to use and where to position it on the weaponpedpersonality.metato detail how certain ped models behave when using the weapon
- Everything properly linked in the
fxmanifest.luafile
Adding the resource to your server
Now that we know this works properly in FiveM, let's add it to our resources folder. Since you will likely have more than one weapon, create a new folder called [weapons] (with brackets). The brackets ensure that FXServer recognizes this folder as a category, so it will load all folders inside the category as long as they contain an fxmanifest.lua file.
For additional information on this matter read the FiveM documentation.
Knowing this lets make the following folder structure.
resources/
├── [qbx]
├── [weapons]/
│   └── m6ic/
│       ├── stream/
│       │   ├── *.ydr
│       │   └── *.ytd
│       ├── meta/
│       │   └── *.meta
│       ├── cl_weaponNames.lua
│       └── fxmanifest.lua
└── [standalone]
And don't forget to add ensure [weapons] to your server.cfg file or any other .cfg file that gets read. If you did everything correctly, there are a few indicators to make sure that FXServer recognizes the resource.
- The console will show that the resource is being loaded. In this case it will even give us a warning about the physical memory size of the texture dictionary file

- In txAdmin under the resource tab, we will see that the resource is started

Testing the weapon
Better yet, use the following code to test whether the weapon works in-game! First, determine the weapon's name by browsing the weapons.meta file. Soon you’ll come across the CWeaponInfo entry; its first line shows the weapon name—in this case, WEAPON_M6IC.
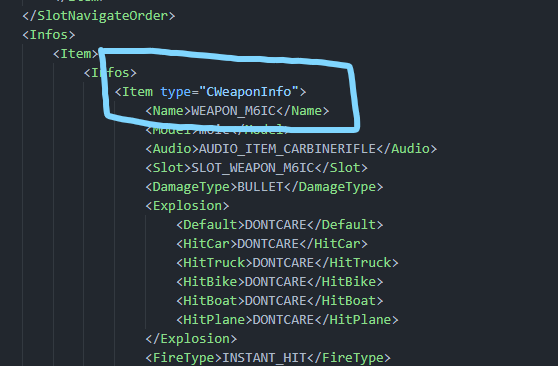
We will use this name in the following code.
RegisterCommand('getweapon', function()
    ExecuteCommand('stop ox_inventory')
    Wait(150)
    local ped = PlayerPedId()
    GiveWeaponToPed(ped, GetHashKey('WEAPON_M6IC'), 250, false, true)
    SetCurrentPedWeapon(ped, GetHashKey('WEAPON_M6IC'), true)
end)
We temporarily stop ox_inventory because it has security measures to prevent equipping weapons that are not registered in the inventory. This command is for testing purposes only.
The weapon works!

For good measure, let's also test the components included with the resource. To do this, look in the weaponcomponents.meta file, specifically the "Name" entries. Fortunately, the naming scheme is self-explanatory—for example, COMPONENT_M6IC_FLSH_02 is a flashlight attachment, etc. By reviewing the list, you can identify each attachment and apply it to the weapon.
RegisterCommand('getweapon', function()
    ExecuteCommand('stop ox_inventory')
    Wait(150)
    local ped = PlayerPedId()
    GiveWeaponToPed(ped, GetHashKey('WEAPON_M6IC'), 250, false, true)
    SetCurrentPedWeapon(ped, GetHashKey('WEAPON_M6IC'), true)

    GiveWeaponComponentToPed(ped, GetHashKey('WEAPON_M6IC'), GetHashKey('COMPONENT_M6IC_CLIP_06'))
    GiveWeaponComponentToPed(ped, GetHashKey('WEAPON_M6IC'), GetHashKey('COMPONENT_M6IC_FLSH_02'))
    GiveWeaponComponentToPed(ped, GetHashKey('WEAPON_M6IC'), GetHashKey('COMPONENT_M6IC_SUPP_03'))
    GiveWeaponComponentToPed(ped, GetHashKey('WEAPON_M6IC'), GetHashKey('COMPONENT_M6IC_STOCK_05'))
    GiveWeaponComponentToPed(ped, GetHashKey('WEAPON_M6IC'), GetHashKey('COMPONENT_M6IC_FRAME_02'))
end)

Configuring ox_inventory
Now that we know the weapon works, we can configure ox_inventory to work with both the weapon and its attachments.
Adding the weapon
Everything you need is in one file called weapons.lua—this is where all information regarding weapons, components, and ammo is stored.
ox_inventory/
└── data/
    └── weapons.lua
First thing you will see is the Weapons table. This is where all the weapons are stored. Remember how to find the weapon name of the weapon inside the weapons.meta file? We will be using that name here.
Weapons = {
    ['WEAPON_M6IC'] = {
        label = 'LWRC M6IC',
        weight = 3300,
        durability = 0.03,
        ammoname = 'ammo-rifle2',
    },
}
And that's it! These six simple lines will ensure your weapon works with ox_inventory. Now, go in-game and test it out.
/giveitem 1 WEAPON_M6IC 1
Remember that we assigned it the ammo-rifle2 ammo type, which already exists in ox_inventory.
/giveitem 1 ammo-rifle2 400

Adding components
Stay within the same weapons.lua file. Use CTRL + F and search for Components to find the table with all the components inside.
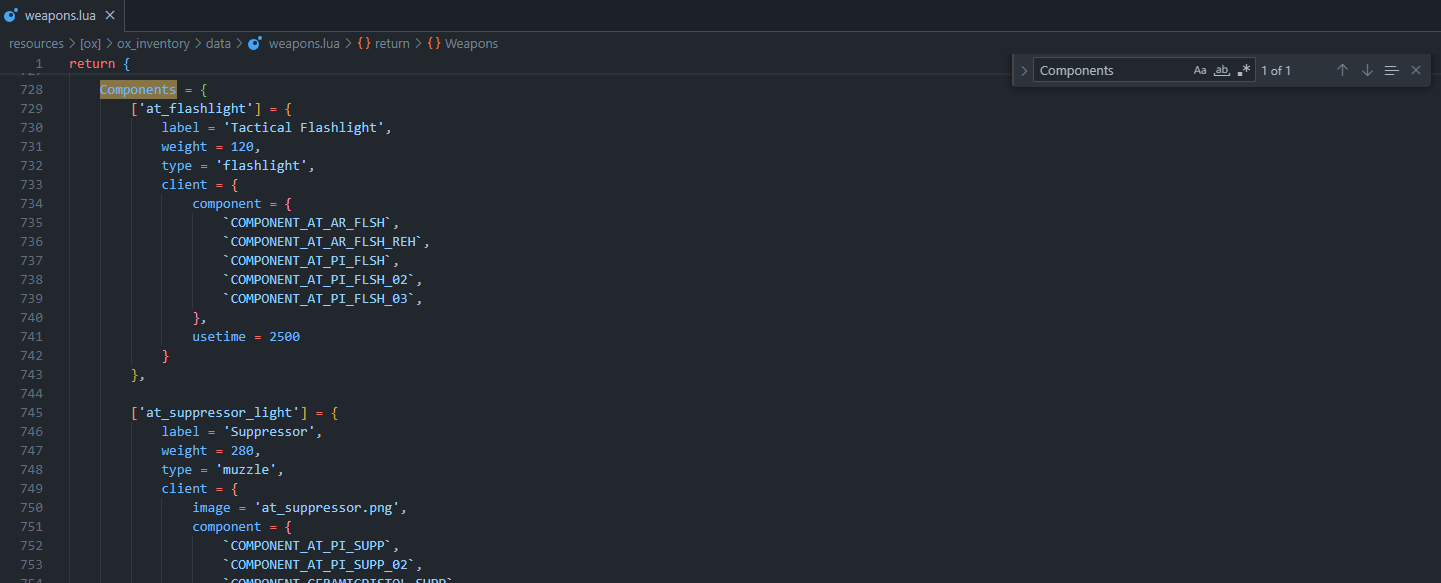
Here, copy another entry. The key will be the name used with the /giveitem command, for example m6ic_flashlight_01. Then create an entry for each component. How do you know which component the item should apply? Check the weapon’s weaponcomponents.meta file for the registered components—in this case, COMPONENT_M6IC_FLSH_01.
If you did everything correctly your code should look like this.
['m6ic_flashlight_01'] = {
    label = 'Tactical Flashlight',
    weight = 120,
    type = 'flashlight',
    client = {
        component = {
            `COMPONENT_M6IC_FLSH_01`,
        },
        usetime = 2500
    }
},
One flashlight is black for the normal frame, while the other is tanned because the weapon includes a component (COMPONENT_M6IC_FRAME_02) to tint the frame.
Now rinse and repeat for all the other components!